Optimize the placement of Anchors in your starter kit for maximum coverage and performance.
Starter Kit Coverage
The Anchors in your starter kit provide coverage for about 120m2, or 1300ft2. Every deployment space is different and using the right Anchor placement will help to produce optimal positioning results. Setting up the Anchors is a quick and easy process, and there are a few key factors that, when followed, will help to ensure the installation goes smoothly.
Power On the Anchors
ZeroKey offers two types of Anchors: Power Over Ethernet (PoE) and Universal. You can read more about the difference between these Anchors in our help article named Selecting the Right Anchor for Your Deployment. PoE Anchors leverage ethernet cabling to permanently power each Anchor, whereas Universal Anchors are battery-powered, making them a convenient and portable choice. Be sure to charge and power on each Universal Anchor before installation. To power on, quickly press and release the grey button.
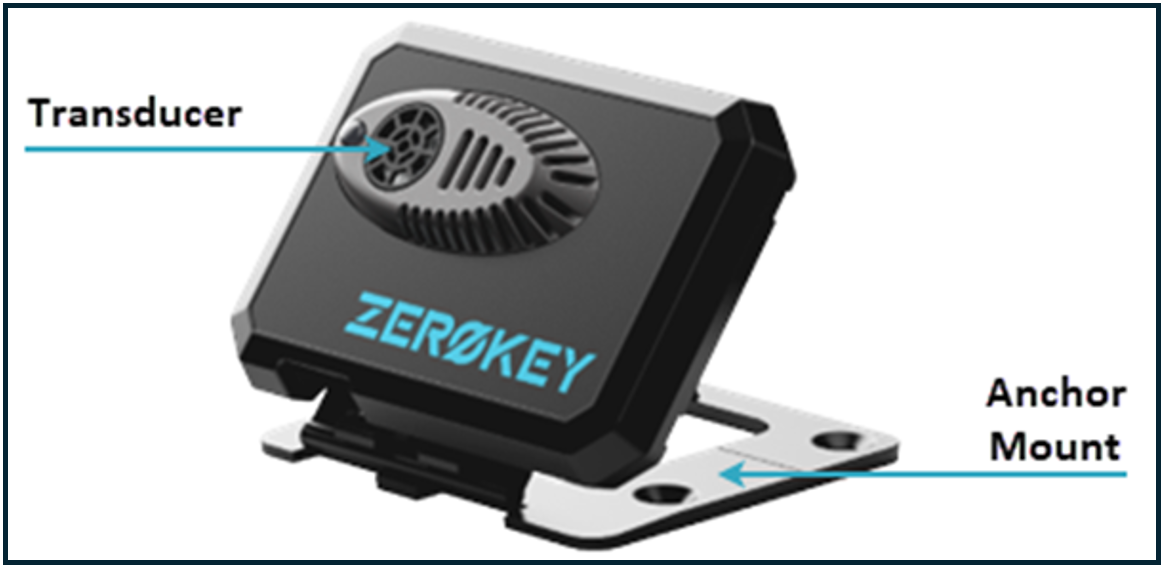
Transducer
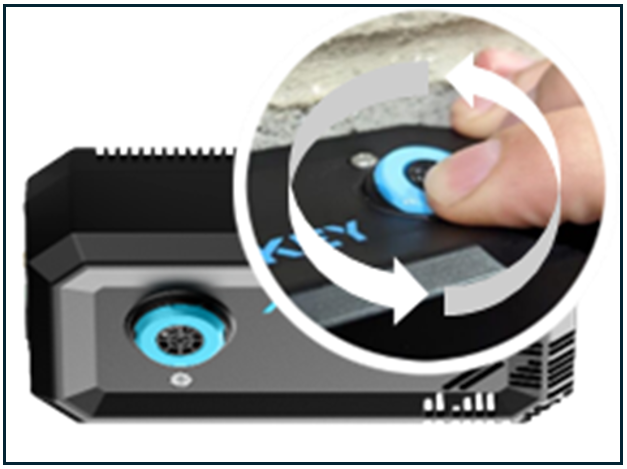
The transducer on every Mobile and Anchor is the point at which the measurement originates during calibration and positioning. Direct the transducer towards the tracked space when installing each Anchor. Your Universal Starter Kit includes an Anchor mount that allows you to angle the Anchor towards the tracked space. PoE Anchors are equipped with a rotatable transducer that should be pointed towards the area of interest by applying light pressure on the blue ring around the transducer.
Anchor Placement
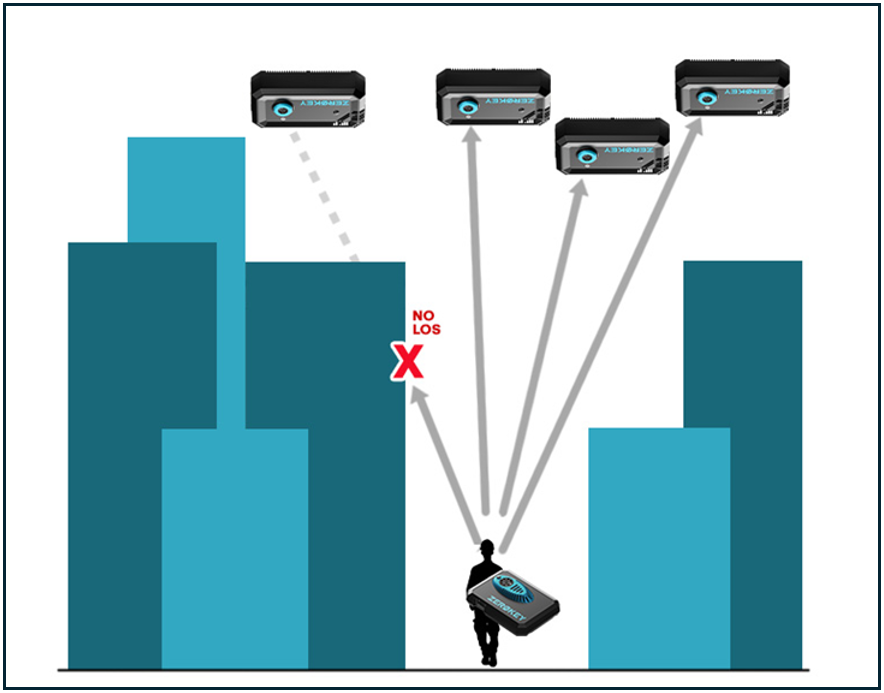
When planning your Anchor layout, it’s important to remember that the Mobile should always have a Line of Sight (LOS) to 4 Anchors. This is called the Rule of Four and it’s part of what helps produce such great performance from your starter kit. One way to achieve this coverage is to use a combination of wall and ceiling Anchor attachments.
Your starter kit comes with Anchor mounts to attach each Anchor to the walls and ceiling of your deployment environment. These mounts are installed by using M3 or #4 flat-head screws or double-sided tape for temporary installation.
Wall and Ceiling Anchor Layout
Use the layout shown in the image below when installing the Anchors. While Universal Anchors are shown in the image, the same layout can be used for PoE Anchors as well. Point the face of each Anchor towards the tracked space.
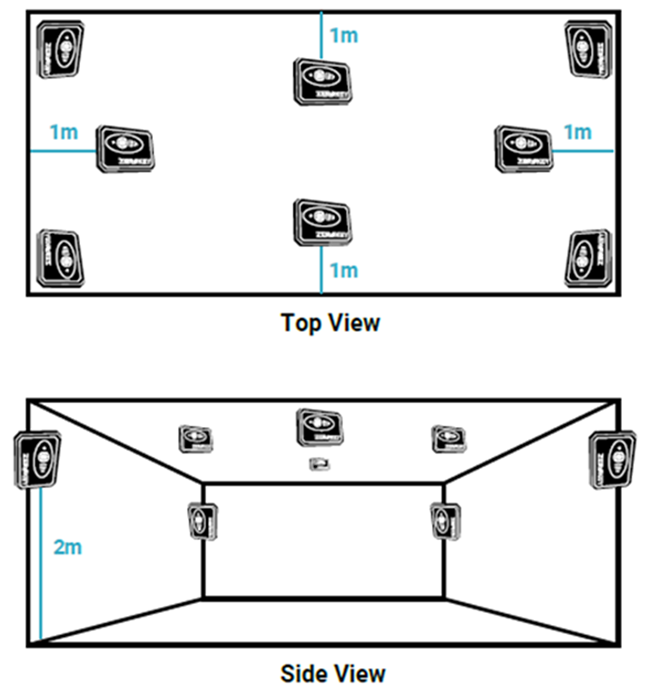
The ceiling-mounted Anchors should be installed no less than 1m from each wall.
Install the wall-mounted Anchors tight to each corner no less than 2m from the floor. If they can’t be mounted in the corners, move the Anchor to a minimum of 80cm from each corner.
Tripod Attachment
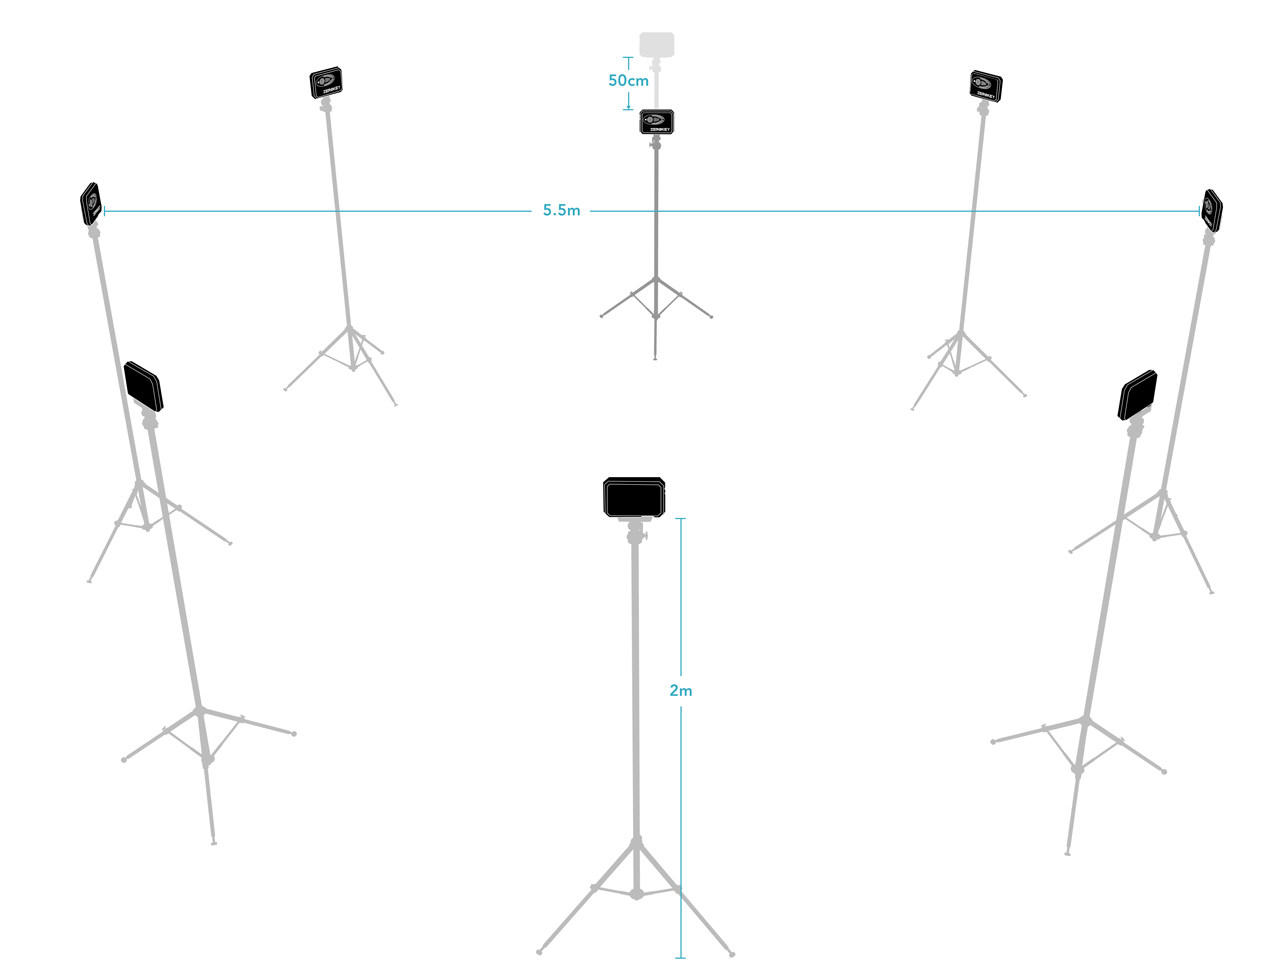
If mounting on walls or ceilings isn’t feasible, using tripods is a great alternative. Arrange the Anchors in a circular formation with a diameter of approximately 5.5m. Attach one Anchor to each tripod and extend them to a minimum height of 2m. Lower one tripod by 50cm. Make sure each Anchor is facing the center of the tracked space.
Vary the Height
Whether you’re attaching the Anchors to the wall, ceiling, or tripods, altering the height of at least one of the Anchors helps ensure great performance. Using a wide variety of Anchor placements creates spatial diversity into the Anchor layout. This eliminates mathematical ambiguity during calibration and positioning, and is an important element when creating your Anchor layout.
Avoid Blockages
If a direct LOS can’t be established between the Mobile and an Anchor, reliable communication between the two cannot be maintained. If blockages are present within the deployment area, consider attaching an Anchor to the obstacle. Keep the Anchors visible and easily noticeable instead of hiding them.
Steer Clear of Straight Lines
Lastly, avoid installing Anchors in long straight rows where there is no variation in vertical or horizontal mounting locations. If Anchors are installed in straight, singular lines, it’s unlikely that calibration or positioning will be successful due to the limited spatial diversity.