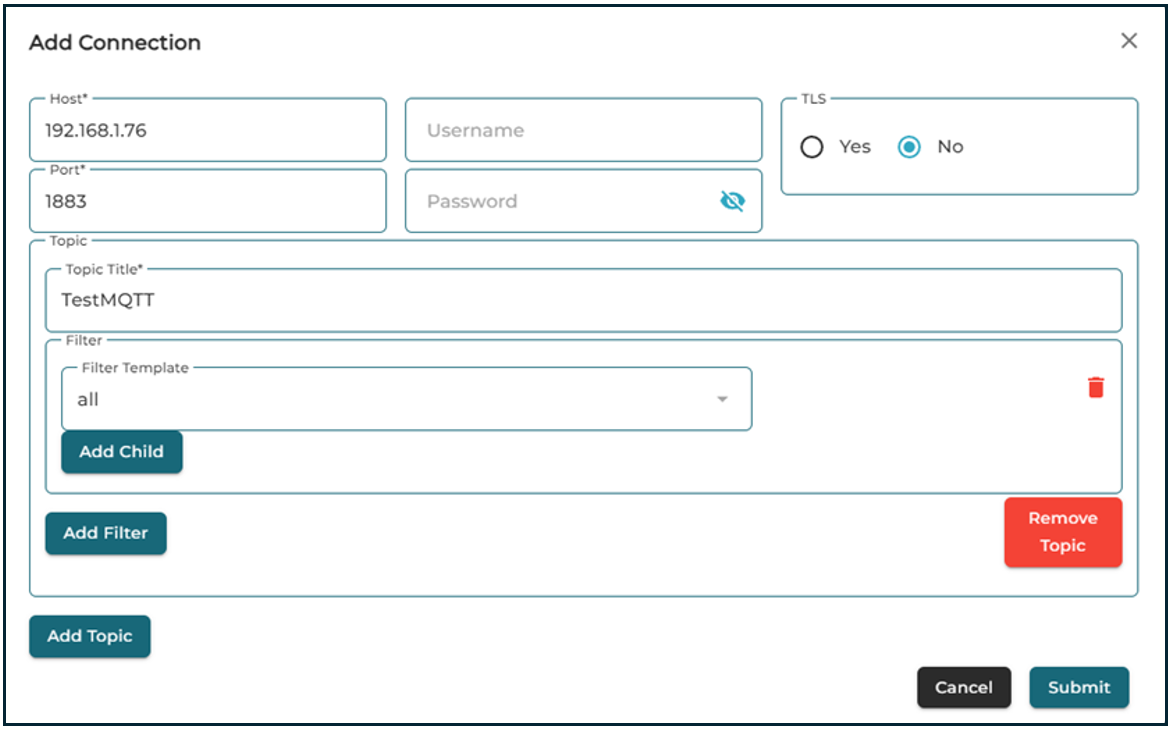
Configure and save a new connection to the MQTT broker.
Adding a New Connection
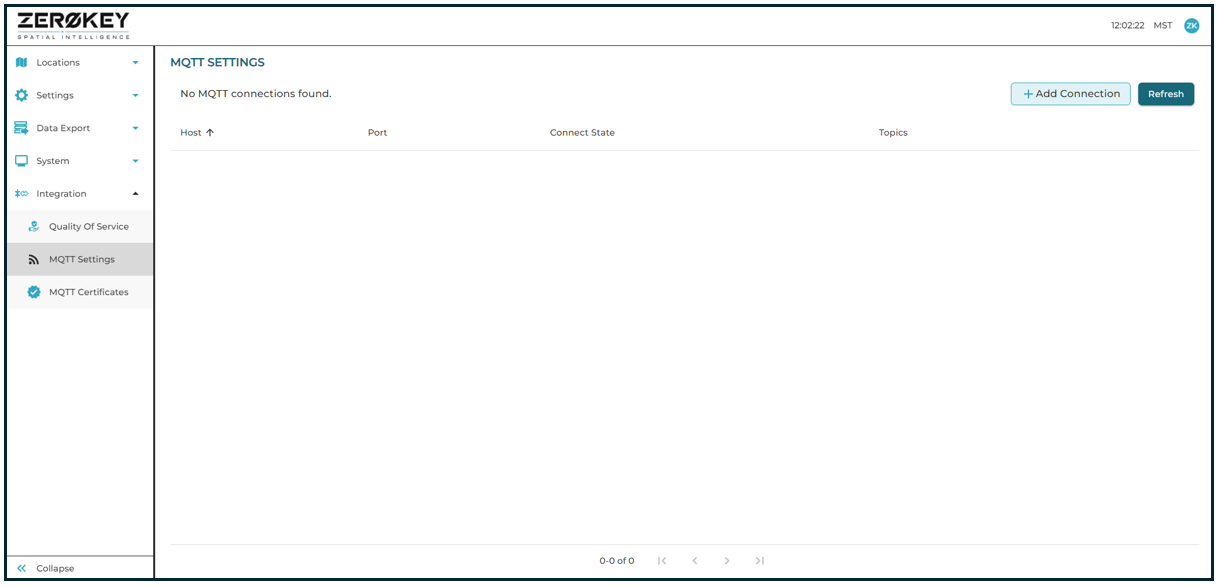
In the ZeroKey Dashboard, navigate to the Integration tab and click MQTT Settings. Then, click the + Add Connection button on the top right corner of the page.
A window will then pop up, prompting you to enter the following details:
-
Host (required):
-
Enter the hostname or IP address of the MQTT broker.
-
-
Port (required):
-
Enter the port number in which the MQTT broker is listening. The default MQTT port is 1883. If you’re using TLS, which is encrypted traffic, the default port is 8883.
-
-
Username (optional):
-
Enter your username if the MQTT broker requires authentication. If authentication is not required, leave it blank.
-
-
Password (optional):
-
Enter the corresponding password.
-
-
TLS (optional):
-
Select Yes if the connection is secured using TLS. Otherwise, select No.
Note: If TLS is required, ensure to use the default port (1883) to successfully establish a connection.
-
-
Topic (required):
-
Enter the MQTT topic that this connection will subscribe or publish messages to.
-
-
Filter (required):
-
When setting up a new connection, you can define advanced message filtering rules to process only specific data based on the requirements. The filtering rules utilize selectors and matching criteria.
-
Under Filter Template, you can select a predefined template to automatically configure filters based on the most used by other users. If you want to select one of the predefined templates, click the dropdown menu under Filter Template and select one of the predefined rules. If you prefer to set your own rules, select None.
-
The Selector defines the criteria of the message that will be checked by the filter.
-
The Type allows you to choose between string (the filter will look for a specific string within the data) and regex (the filter will apply regular statements to the message content to determine matches).
-
-
-
Add Child:
-
This function allows the ability to add more filter criteria to the current filter.
-
-
Add Filter:
-
This function allows the ability to add the defined filter to the connection settings.
-
-
Add Topic:
-
This function allows the ability to add more topic fields to enable the connection to handle multiple topics at once.
-
After filling out the required fields, click the Submit button located on the bottom right corner.
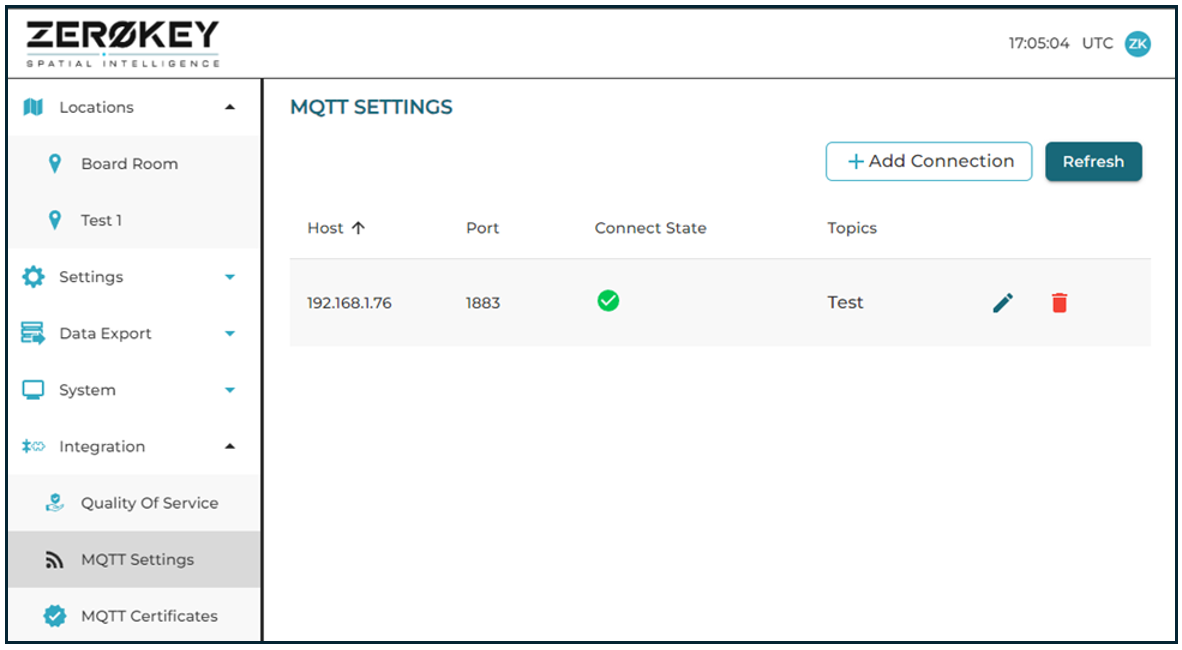
You will then see the connection added in the MQTT Settings tab.
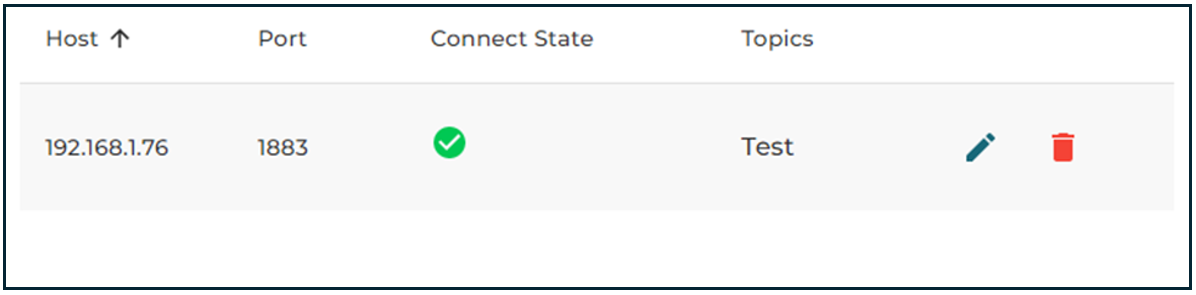
Connection Management Options
After successfully adding an MQTT connection, you can either edit or delete the entry.
Editing the Connection:
-
To adjust the current MQTT settings, click the pen icon located to the right, as shown below.
Deleting the Connection:
-
To delete the connection, click the bin icon – also shown below.
-
A confirmation prompt will pop up to ensure that removal is intentional. Click Cancel to abandon the deletion process and Confirm to permanently delete the connection.
-