Use Postman to Simulate a Reconnection from the ZeroKey MQTT Client to the Broker
Using ZeroKey’s API and Postman you can simulate an automatic reconnection from the ZeroKey MQTT client to the MQTT Broker at intervals of your choosing.
The ZeroKey API
The ZeroKey API enables modules, applications and tools to interact with ZeroKey’s Spatial Intelligence Platform (SIP). Core functions of the Quantum RTLS hardware are accessible through the API, giving you direct control of system operation.
Obtain a Bearer Token in Postman
Begin by reading our help article Establishing an API Connection and Obtaining a Bearer Token using Postman. Once you’re connected, be sure to copy the token before continuing.
Postman MQTT Module: GET
In Postman, click the Standard Modules folder and access the MQTT Module folder. Click Get MQTT Settings.
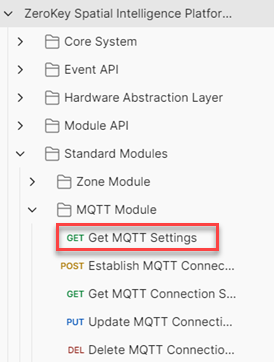
Click on the Authorization tab at the top of the screen. In the Auth Type dropdown menu, select Bearer Token.
Paste the Bearer Token you generated earlier in the Token field, then click the Send button.

In the Body tab on the bottom of the page, the MQTT setting will be reported. Copy the full ConnectionID, which will look similar to the following:
"ConnectionID" : "256aec98-4027-4c0f-9be9-167cd227ddc0",
Postman MQTT Module: PUT
Navigate to the PUT Update MQTT Connection Settings menu in the MQTT Module folder:
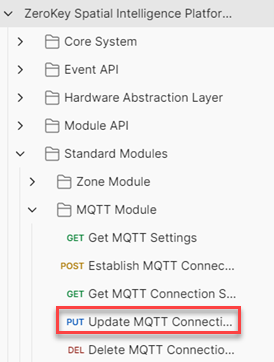
Click on the Authorization tab and under Auth Type select Bearer Token.
Under the Token field paste the Bearer Token that you generated.
Next, navigate to the Body tab and copy and paste the following:
{
"host": "10.20.0.1",
"port": 8883,
"TLS": true,
"username": "string",
"password": "string",
"topics": [
{
"topic": "ifield/location/test",
"FilterChain": [
{"FilterTemplate": "dashboard"}
]
}
]
}
Change the Host IP Address
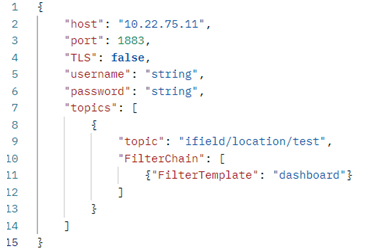
Change the “host” IP address to your MQTT IP address and enter the port number that the MQTT Broker is using.
If TLS is not required, set it to false as shown in the sample image below:
Modify the URL
Use the following sample URL:
{{baseUrl}}/{{version}}/modules/mqtt/{ConnectionID}
Replace
{ConnectionID}with the ConnectionID that you generated in the Get MQTT Settings. Refer to the sample image:

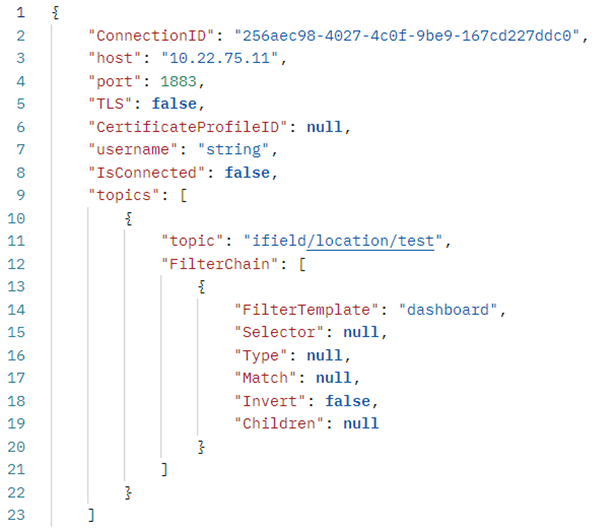
Click the Send button. Postman will report the following information:
Schedule the Run Frequency
Click the Runner button located at the bottom of the page.

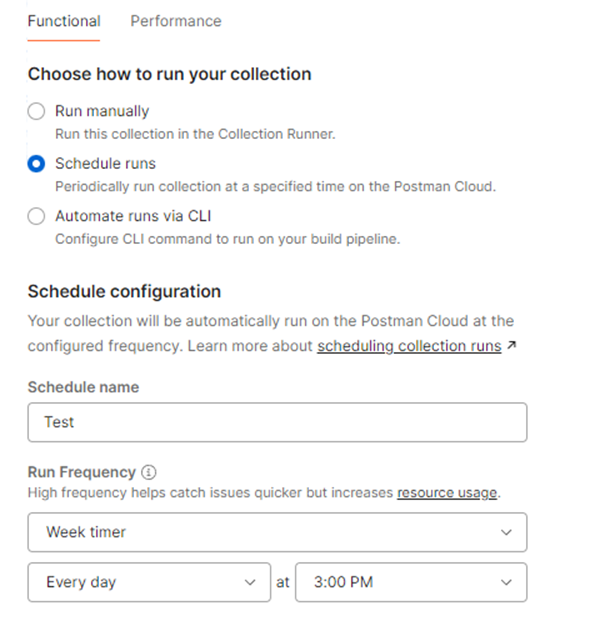
Under Choose how to run your collection select the Scheduled Runs option.
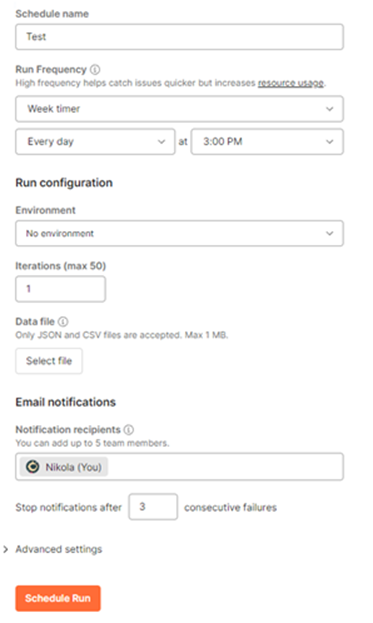
Under Schedule Configuration set the Schedule name and then edit the Run Frequency based on your requirements.
10. On the left side of the screen, drag and drop the collection that you want to run and automate.

Schedule Run
11. Click the Schedule Run button at the bottom of the Schedule Configuration page.
