Setting Up an MQTT Broker on Linux using Mosquitto
For information on how to set up an MQTT broker on Windows using Mosquitto, please read our help article Setting Up the MQTT Broker on Windows using Mosquitto.
Getting Started
Installing Mosquitto
Start by updating your package list to ensure you have the latest repository. To do this, open a terminal and enter the following command:
sudo apt updateNext, install the Mosquitto broker and the Mosquitto Clients by entering the following command:
sudo apt install mosquitto mosquitto-clients
Configuring the MQTT Broker
To configure the Mosquitto broker, edit the Mosquitto configuration file:
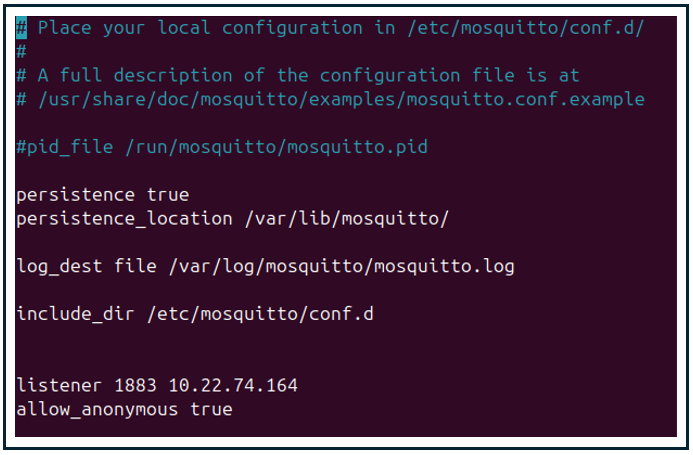
sudo nano /etc/mosquitto/mosquitto.confThe following image shows an example configuration:

Make sure to enter the following commands:
listener 1883 (your IP address)allow_anonymous true
NOTE: To check the IP address of your Linux machine, enter the following command in the terminal:ifconfig
The following image shows the output of the command. Use the inet IP address shown in your mosquitto.conf file.

Start and Enable Mosquitto Service:
Enter the following commands in the terminal to start and enable the Mosquitto Service.
sudo systemctl start mosquittosudo systemctl enable mosquitto
Test the broker by publishing and subscribing to a test topic using the ZeroKey Dashboard:
Open the terminal and enter the following command:
mosquitto sub -h [ip address from the mosquitto.conf file] -t "test"Navigate to the ZeroKey Dashboard.
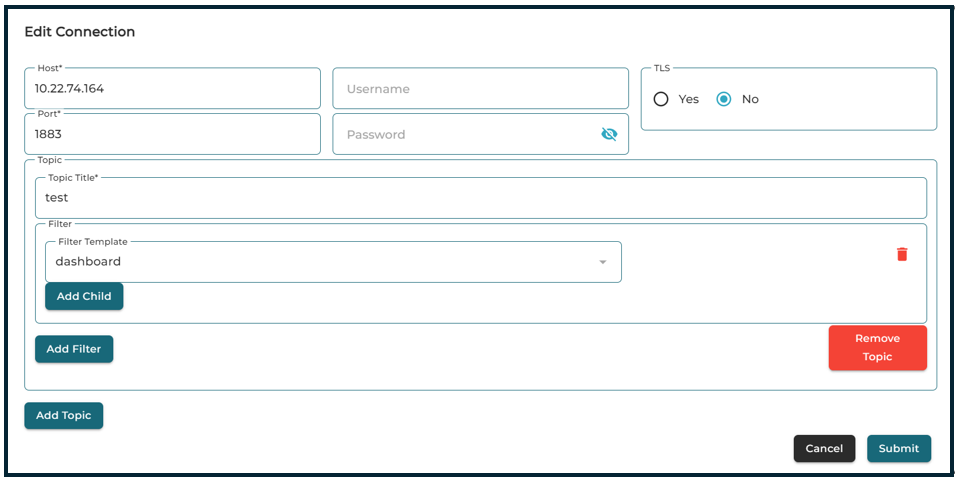
In the Integration tab, select the MQTT Settings, then click the + Add Connection button.
Under Host*, enter the IP address of the broker (Linux machine).
Under Port*, enter the port number 1883.
Under the Topic Title*, enter the same name as the broker’s topic. In this example, we are using topic named test.
Then, under Filter Template, select what data you wish to receive and click the Submit button.

Upon successful connection, you will see the feedback in the MQTT Settings section, along with the Connect State of the MQTT connection. On the right, click the blue pencil icon to edit a connection and the red bin icon to delete it.

