Anchor Deployment
Before you begin calibration, ensure that you’ve powered on one Mobile and eight Anchors by briefly pressing the button on each device. A slow-flashing green LED confirms that the device is powered on. For PoE Anchors, make sure they are connected to the power source.
For detailed guidance on optimizing the placement of Anchors for maximum coverage and performance, check out our Anchor Layouts for Starter Kits article.
Gateway Connection
Launch the ZeroKey Config Tool and connect the Gateway to your PC using the supplied USB cable. The green LED on the Gateway confirms that it’s powered on. Click the Connect button in the upper right corner of the screen to establish a connection.
Anchor Calibration
The calibration steps are extremely important as an improperly calibrated system may output erroneous data and compromised positioning outcomes. Additionally, calibration failures may occur if the calibration steps are not closely followed.
With the hardware powered on, the system calibration steps can be performed. The calibration process includes the collection of large amounts of data to achieve precise positioning outcomes.
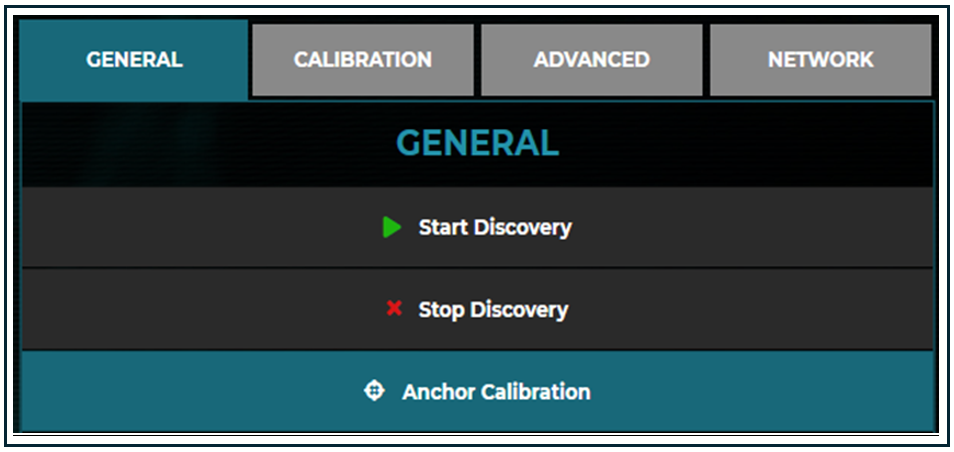
Click Anchor Calibration to launch the calibration wizard. The wizard not only provides detailed steps to follow but will also display the calibration’s progress through the percentage of data quality per Anchor.
Calibration Wizard Guide
Node Discovery
Node Discovery verifies that the correct number of Anchors and Mobiles are detected. Node Discovery can be refreshed by clicking Refresh Discovery Search. Note that exactly one Mobile must be turned on to proceed.
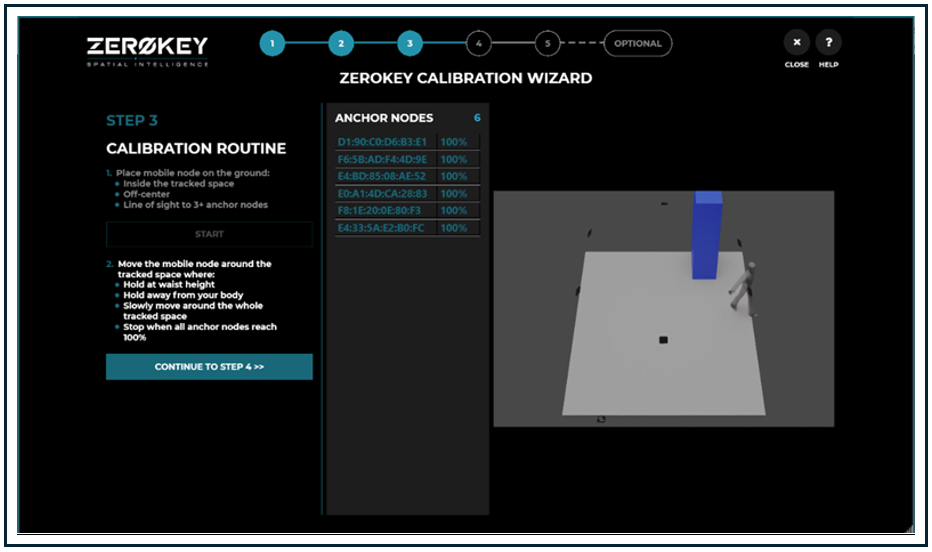
Calibration Routine
-
To begin calibration, click Start.
-
Allow a small number of measurements to be collected before picking up the Mobile and slowly moving it through the tracked space.
-
Extend the Mobile away from your body. Ensure that your arm is extended at chest height and move the Mobile through the tracked space with the transducer facing the Anchors.
-
Keep the Mobile in motion throughout the tracked space until the data quality indicator for each Anchor reaches 100%. The user must walk through the tracked space and in between the Anchors to enable the wizard to collect the required data.
-
Avoid remaining stationary during the calibration process.
-
Once 100% data quality is achieved for all Anchors, a chime will sound – notifying the user to place the Mobile back on the floor.
-
The user may proceed to Step 4 in the calibration wizard.
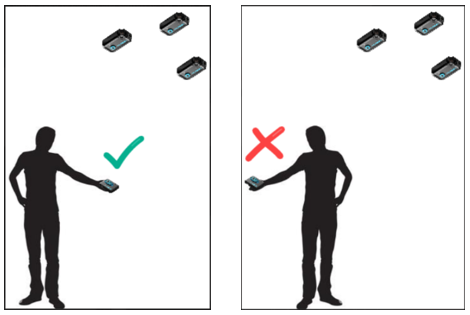
Hold the Mobile with the Hand Closer to the Anchors
When handling the Mobile during calibration, ensure that your body isn’t blocking the Mobile’s line of sight to Anchors. This reduces the likelihood of obstruction between the Anchors and the Mobile, leading to improved calibration results. The diagram below illustrates this technique.
Calibration Processing
The processing time during calibration may vary. However, if the calibration process exceeds 5 minutes, it’s best to adjust the Anchor locations in accordance with our help article about Anchor layouts and retry the calibration. The following table provides a quick reference to assess the quality of the calibration after it is completed.
|
Solve Quality |
Description |
|
Green |
Calibration was successful. Advance to positioning. |
|
Yellow |
Calibration was successful, but quality metrics indicate that the solve may not meet accuracy requirements. We recommend recalibrating before proceeding. |
|
Red |
Calibration was unsuccessful. We recommend reviewing the Anchor layout guidelines and calibration steps before attempting a recalibration. |
Scale Check or Finish Calibration
You can further verify calibration solve quality by performing a scale check.
Once the calibration processing is complete, you may choose between two options to proceed:
-
Finish Calibration: To proceed to positioning, click the Finish Calibration button. Then, press the Close Window button to conclude the calibration wizard.
-
Scale Check (optional): To verify calibration solve quality, perform a scale check. This step is optional and can be skipped if you prefer to go directly to positioning.